If you have ever scrolled past a tray of shimmering, prismatic donuts and thought “how did they do that?” you are not alone.
Learning how to make edible glitter donuts is one of those skills that looks incredibly complicated but is actually very approachable once you understand a few key techniques.
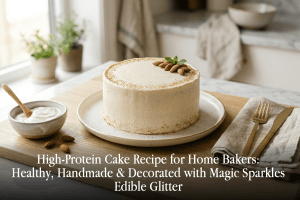
Whether you are baking for a birthday party, a bridal brunch, or simply want to elevate your weekend baking game, glittered donuts make a statement that is genuinely hard to match.
Edible glitter donuts are one of the most visually striking things you can produce in a home kitchen and the technique is far more accessible than the results suggest. This guide covers everything from choosing the right base and glaze, to applying edible glitter like a professional, to building a finished tray that looks like it came straight from a high-end bakery.
What You Need to Make Edible Glitter Donuts
Before you start, having the right tools on hand makes the whole process smoother. Here is what you will need:
- Your donuts: Homemade, store-bought, or from your local bakery. Both baked and fried versions work well.
- A glaze or icing base: This is what makes the glitter stick. More on this below.
- Truly edible glitter: This is the most important ingredient on the list. Not all glitters are created equal, and the distinction matters more than most people realize. Truly edible glitter, like Magic Sparkles, is made from food-grade maltodextrin and dissolves safely in the stomach. It is actual food. Many products on the market are labeled “non-toxic” but are made from polyester or plastic that passes through the digestive system without breaking down. Always check the ingredient list before you buy.
- A small brush or spoon: For controlled application.
- A clean workspace with good lighting: Glitter catches light beautifully, and good lighting helps you see where you have already applied it.
Choosing The Right Donut Base
Your glitter donut journey starts with the donut itself. The surface texture of your donut affects how glitter sits and how it catches light, so it is worth thinking about before you start decorating.
Glazed donuts are the classic choice for glitter work. Their smooth, slightly tacky surface is ideal for glitter adhesion and gives you that glossy, mirror-like base that makes sparkle pop.
Cake donuts have a drier, denser surface. They absorb glaze more readily, which actually works in your favor since you can build up a thicker coating that holds glitter well.
Yeast donuts are lighter and more pillowy. Their soft exterior can be a bit more porous, so a slightly thicker glaze or a double-coat approach works better.
If you are following a glitter donut recipe from scratch, a classic yeast or buttermilk cake base both work beautifully. The key is to make sure your donut is fully cooled before you begin the decorating process. Applying glaze to a warm donut causes it to run and thin out, and glitter applied over a thin glaze tends to slide and clump.
Preparing A Shiny Donut Glaze
A shiny donut glaze is your foundation, and it does two jobs: it adds flavor, and it acts as the adhesive that keeps your edible glitter exactly where you put it. The good news is that a great glaze is simple to make.
Classic vanilla glaze: Whisk together 1 cup of powdered sugar, 2 to 3 tablespoons of whole milk, and half a teaspoon of vanilla extract until smooth. You want a consistency that coats the back of a spoon but still pours easily. Too thick and it drags the glitter. Too thin and the glitter slides off before it sets.
White chocolate glaze: Melt 150g of white chocolate with a tablespoon of coconut oil until smooth and glossy. This gives you an incredibly shiny surface and a richer flavor. White chocolate also sets firmer than a sugar glaze, which means it holds glitter exceptionally well once cooled.
Color-tinted glaze: A drop of gel food coloring transforms a basic glaze into something dramatic. Pink, lavender, and baby blue glazes under prismatic edible glitter create a stunning visual contrast. Use gel coloring rather than liquid, since liquid coloring can thin your glaze and change the consistency.
How to Make Edible Glitter Donuts That Actually Sparkle
This is the moment the whole process comes to life. The technique you use matters as much as the products you choose. The single most critical variable is timing: professional bakers apply glitter within 60 seconds of glazing for best adhesion. Once the glaze begins to set, the window for proper glitter bonding closes quickly.
Step 1: Dip your donut in the glaze. Hold the donut by its base, dip the top into the glaze, and let the excess drip off for a few seconds before setting it down on a wire rack.
Step 2: Apply glitter immediately while the glaze is still wet. This is the critical window — glitter applied to a fully set glaze will simply bounce off or sit loosely on top without bonding to the surface.
Step 3: Use a spoon for full coverage. If you want the entire top of your donut to shimmer, use a small spoon to scatter glitter generously across the surface. Tap the rack lightly to help it settle evenly.
Step 4: Use a brush for detail work. A dry pastry brush lets you concentrate glitter in specific areas, blend two colors together, or create gradient effects from the edge inward.
Step 5: Let the glaze set completely before moving your donuts. This usually takes 10 to 15 minutes at room temperature. Resist the urge to stack them before they are fully set.
Donut Icing Decoration That Holds Glitter Well
Not all icing behaves the same way when it comes to holding glitter. Donut icing decoration is a slightly different skill set from standard cake decorating, because donuts have more surface exposure and tend to be handled more than a slice of cake.
Royal icing sets rock hard and holds glitter firmly in place. It is ideal if you are making donuts ahead of time or need them to travel. The trade-off is that royal icing can be a bit brittle and less pleasant to eat.
Mirror glaze is the showstopper option. Its ultra-glossy surface sets like glass and makes edible glitter look almost three-dimensional. It requires a bit more technique to apply evenly, but the results are extraordinary.
Cream cheese frosting is softer and stays tacky longer, which gives you more time to apply glitter. Because it does not set as hard, it works best for donuts that will be served fairly quickly after decoration.
Whatever you choose for your donut icing decoration, apply glitter to a surface that still has some tackiness to it, and allow everything to set undisturbed before serving.
DIY Donut Decoration Techniques
Once you have the basics down, DIY donut decoration opens up a whole world of creative possibilities. Here are a few techniques that consistently produce stunning results:
Half-and-half glazing: Dip the donut in a white glaze, then dip just one side in a colored glaze. Apply two different glitter shades to each half for a striking two-tone effect.
Drizzle technique: Apply a base glaze, scatter glitter generously, then drizzle a contrasting colored glaze across the top. The glitter catches both layers and creates incredible depth.
Stamped icing: Press a cookie stamp into a rolled fondant disc, lay it on top of your glazed donut, and apply fine-dust glitter around the stamped edges for a jewel-like frame effect.
Layered glitter application: Apply one color of glitter while the glaze is wet, let it set slightly, then apply a second color. This creates a dimensional, multi-toned shimmer that changes as the light shifts.
Creative Donut Decoration Ideas For Parties
When you are decorating for an event, donut decoration ideas can be themed and personalized in ways that make the whole dessert table feel intentional and cohesive.
Baby showers: Pale pink or blue glazes with White Crystal or Rose Quartz edible glitter create a soft, dreamy aesthetic that photographs beautifully. Stack them on a tiered stand for a donut tower that doubles as a centerpiece.
Weddings and bridal brunches: Gold and silver edible glitter on a champagne-colored glaze feels luxurious and elegant. Add edible pearls or pressed edible flowers alongside the glitter for a high-end bakery donut styling look.
Halloween: Black glazed donuts with holographic purple or orange edible glitter are genuinely spectacular. The contrast between the dark base and the prismatic shimmer is striking.
Birthday parties: Let the birthday person choose their glitter color and make decorating a group activity. Kids especially love getting involved in the process themselves.
In professional event catering, glittered donuts are a reliable choice for dessert table setups precisely because they photograph immediately and are the first item guests reach for — the visual impact of edible glitter on a donut outperforms almost any other decoration at the same effort level.
Edible Decorations That Pair Well With Glitter
Edible decorations for donuts go well beyond glitter alone. Layering different elements creates texture, contrast, and visual complexity that takes your decorating to the next level.
Edible luster dust applied with a dry brush adds a subtle metallic sheen underneath your glitter layer, giving the finished donut an almost liquid-gold appearance.
Edible flowers pressed onto a still-tacky glaze, then dusted lightly with fine edible glitter, create a botanical, romantic look that is popular for spring and summer events.
Sprinkles and nonpareils mixed with edible glitter give you a more textured, playful finish. The key is to apply glitter first for the prismatic shimmer, then add sprinkles on top so they do not obscure the glitter’s light-catching effect.
Edible gold leaf layered under edible glitter creates an extraordinarily luxurious finish. The irregular texture of the leaf interacts with the glitter to produce a depth and complexity that is difficult to achieve any other way.
Bakery Donut Styling Tips For Better Presentation
If you want your donuts to look as good as the ones you see in bakery windows or in editorial food photography, bakery donut styling is a skill worth developing alongside your decorating technique.
Use a wire rack, not a plate. Donuts styled on a wire rack look more intentional and professional than donuts on a flat plate. The rack elevates them slightly and allows glaze to drip cleanly without pooling underneath.
Group donuts in odd numbers. Three or five donuts arranged together always look better than two or four. This is a photography trick that food stylists use constantly.
Vary your glitter colors across a tray. When decorating for a party or event, using two or three complementary glitter shades across the tray rather than one uniform color makes the whole display more dynamic and visually interesting.
Consider your background. A marble surface or a piece of dark slate makes edible glitter pop dramatically. White glitter on a white surface disappears. Contrast is your friend.
Add height. A tiered stand, a cake board, or even a simple stack of books under a cloth creates levels in your display that make everything look more considered and editorial.
Conclusion
Edible glitter donuts are genuinely one of the most rewarding decorating skills you can develop. The results are dramatic, the technique is accessible, and the impact on everyone who sees them is immediate. Whether you are making a batch for a birthday, a bridal brunch, or just because you deserve something beautiful on a Saturday morning, edible glitter transforms a simple donut into something that feels genuinely special.
The most important thing to remember is to use truly edible glitter. Products made from food-grade ingredients like maltodextrin are safe for everyone, dissolve completely, and perform beautifully. Products labeled “non-toxic” but made from plastic or polyester are not the same thing, no matter how similar they look in the jar.
Start with a smooth glaze, apply your glitter while the surface is still tacky, and let everything set before you handle your donuts. Professional bakers choose food-grade, fully digestible glitter like Magic Sparkles for consistent, safe, and visually reliable results — and for good reason.
Find out where to buy edible glitter for donuts that gives you professional-grade shimmer every time.
FAQ
Can you use edible glitter on donuts without it falling off?
Yes, as long as you apply it to a tacky surface. Edible glitter adheres best to a wet or slightly tacky glaze. If the glaze has fully set before you add glitter, it will not stick properly. Apply glitter immediately after glazing for the best results.
What type of glaze works best when applying edible glitter to donuts?
A classic powdered sugar glaze, a mirror glaze, or a white chocolate glaze all work very well. Mirror glaze and white chocolate glaze set with a harder, shinier finish that holds glitter more firmly. A standard sugar glaze works beautifully too, particularly if you apply glitter while it is still wet.
Is edible glitter safe to use on hot donuts?
It is best to wait until your donuts have fully cooled before applying glaze and glitter. Applying glaze to a hot donut causes it to run and thin out, and glitter applied to a runny glaze will not adhere evenly. Give your donuts at least 15 to 20 minutes to cool completely.
How do you make edible glitter stick to donut icing?
The key is timing. Apply your glitter while the icing or glaze is still wet and tacky. If you are working with a firmer icing like royal icing that has already set, you can brush a very thin layer of food-safe piping gel over the surface first, then apply glitter on top of the gel.
Can edible glitter be used on homemade and store-bought donuts?
Absolutely. Edible glitter works on any donut surface as long as you have the right glaze or adhesive layer. Store-bought donuts often come pre-glazed, which can actually make things easier. Simply apply your chosen glitter to the existing glaze if it still has some tackiness, or add a thin layer of piping gel on top if the glaze has fully set.